OverTheWire Bandit: Levels 12–17
Level 12 — The hexdump russian nesting doll
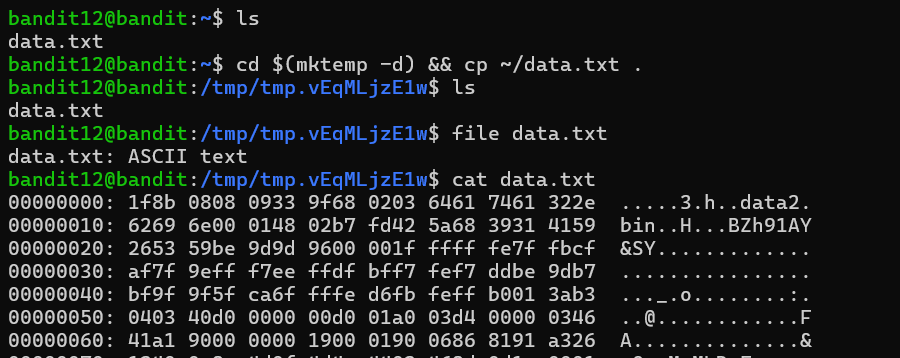
This was the longest and most time-consuming puzzle in the batch for me. The hint already revealed two important constraints: I needed to work under /tmp because the home directory for this level was read-only, and the file had been compressed repeatedly through several different formats.
The first step was converting the hexdump back into raw binary data. I used xxd -r, where the -r flag reverses the hex dump and reconstructs the original bytes from the hexadecimal representation.
Once I had the binary file back, the workflow became a repeated cycle of identifying the current file type with file, then using the appropriate tool to extract the next layer. Depending on what file reported, I used gunzip for gzip data, bunzip2 for bzip2 data, or tar xf for tar archives. In some cases I had to rename files first because tools like gunzip and bunzip2 expect standard extensions such as .gz or .bz2.
The difficult part of the level was that the compression formats alternated several times in sequence. I could not assume the next layer would use the same format as the previous one, so checking the file type after every extraction step became essential. My workflow eventually turned into a repeating loop: identify the file type, extract one layer, then check the result again.
flowchart LR
  A["xxd -r → raw bytes"] --> B["file: what is it?"]
  B -->|gzip| C["gunzip"]
  B -->|bzip2| D["bunzip2"]
  B -->|tar| E["tar xf"]
  C --> B
  D --> B
  E --> B
  B -->|ASCII text| F["cat → password"]
Another challenge was simply staying organized. After several rounds of extraction, my working directory filled with similarly named intermediate files, making it easy to lose track of which layer I was currently working on. I eventually found that naming files by stage number or restarting cleanly in a fresh /tmp directory was often faster than trying to untangle a messy workspace.
When file finally reported ASCII text, I knew I had reached the end of the chain. Reading the resulting file with cat revealed the password for the next level.
More than anything else, this level reinforced three habits that apply well beyond CTFs: identify a file before acting on it, keep intermediate work organized, and do not hesitate to restart cleanly when a workflow becomes confusing.


Level 13 — SSH with a private key
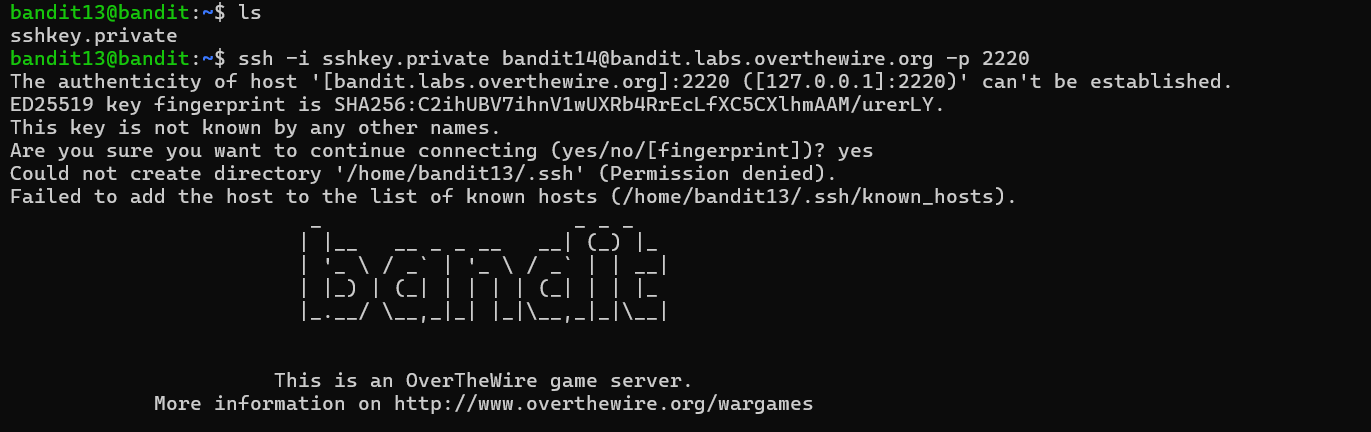
This level introduced SSH key-based authentication. Instead of being given the next password directly, I was given a private key file named sshkey.private and needed to use it to log in as bandit14 on the same machine using localhost.
The -i flag tells ssh to authenticate using a specific identity file rather than prompting for a password. In this case, the identity file was an OpenSSH private key. Since possession of a private key is enough to authenticate as the associated user, SSH enforces strict permission checks on key files before it will use them.
My first login attempt failed with a permissions error.
SSH rejected the key because it was readable by other users on the system. To fix that, I changed the permissions so that only my user account could access the file. I used chmod 600, which gives the owner read and write permissions while removing access for everyone else. (400, which is read-only for the owner, would also have worked.)
Once the permissions were corrected, SSH accepted the key and allowed me to log in as bandit14. From there, I could finally read /etc/bandit_pass/bandit14, which was only accessible because I was now authenticated as the correct user.
This level reinforced an important real-world security rule: private SSH keys should never be accessible to other users on the system.

Level 14 — Talking to a local service with nc
Once I logged in as bandit14, the password file at /etc/bandit_pass/bandit14 finally became readable because I was now authenticated as the correct user. The goal of the level was to send that password to a service listening locally on port 30000, which would then respond with the password for the next level.
To communicate with the service, I used nc (netcat), a utility that opens raw TCP or UDP connections. By piping the password into nc, I could send the contents of the password file directly into the service and read the server’s response back through standard output.
This was also the level where the overall structure of Bandit finally clicked into place for me. Every file in /etc/bandit_pass/ is only readable by its corresponding user, which is why each level requires authenticating as the next account before continuing. Once I understood that pattern, the progression of the game started to feel much more coherent.
After sending the correct password to the service, the server responded with a confirmation message followed by the password for bandit15.

Level 15 — TLS client with openssl s_client
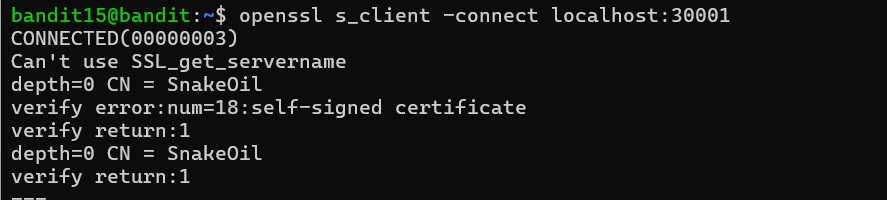
This level followed the same overall pattern as the previous one, except the service on port 30001 was protected with TLS encryption. A normal nc connection was no longer enough because the server expected a TLS handshake before accepting any data.
To connect to the service, I used openssl s_client, which acts as a simple TLS-aware client. The -connect option specifies the target host and port, while -ign_eof prevents the connection from closing immediately when standard input reaches end-of-file.
Once the TLS connection was established, openssl s_client displayed information about the handshake, including certificate and cipher details, and then waited for input. I submitted the password retrieved from the previous level, and the service responded with the password for bandit16.
This level introduced an important distinction between plain TCP communication and encrypted TLS communication. Tools like nc work well for raw sockets, but once encryption is involved, a TLS-capable client such as openssl s_client becomes necessary. It also showed me that openssl s_client is useful for more than just Bandit — it can be used to inspect certificates, test encrypted services, and troubleshoot TLS connections manually.
Level 16 — Finding the right port
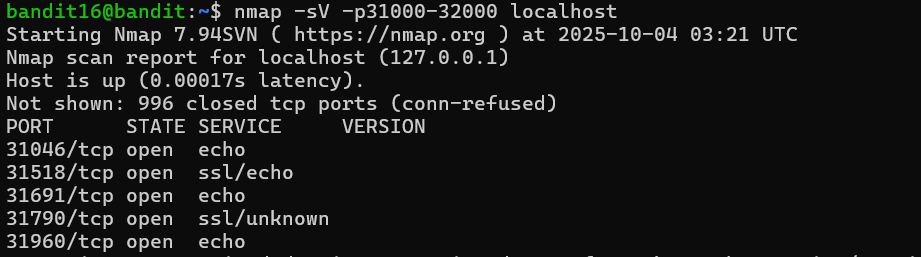
This level combined several networking concepts at once: port scanning, TLS service probing, and handling SSH key material returned over a network connection. Instead of being told exactly which service to use, I first had to discover which ports in the 31000–32000 range actually had servers listening on them.
To do that, I used nmap, a network scanner commonly used for service discovery and security testing. The -p option specifies a port range, and nmap probes each port to determine whether it is open or closed. A handful of ports came back as open.
From there, I connected to each candidate service using openssl s_client because the challenge hinted that some of the services were using TLS encryption. Most of the servers simply echoed back whatever input I sent them, but one behaved differently. After I submitted the current level’s password, the service responded with a multi-line PEM block instead of plaintext output.
The PEM block was an SSH private key. I saved it into a temporary working directory under /tmp, adjusted the file permissions so that only my user could read it, and then used the key with ssh -i to authenticate into the next Bandit account.
This level tied together several tools that often appear together in real-world troubleshooting and security work: nmap for discovery, openssl s_client for probing encrypted services, and SSH keys for authentication. It also reinforced the idea that interacting with unknown services is often an iterative process of discovery, probing, and interpretation rather than following a single predefined command.


Level 17 — Diff two password files
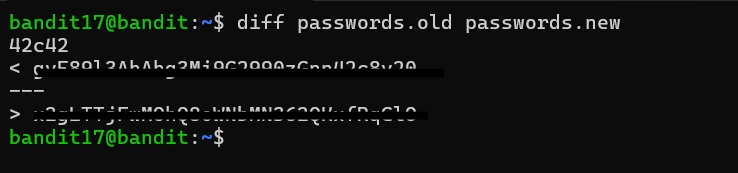
This level introduced the diff command, which compares two files line by line and displays only the differences between them. Since the challenge stated that the password was the only line that had changed between passwords.old and passwords.new, diff was the natural tool for the job.
The output format uses directional markers to show which file a line came from. Lines beginning with < belong to the first file passed to diff, while lines beginning with > belong to the second. Because the challenge specified that the password was stored in passwords.new, the line prefixed with > contained the value I needed.
Although this was one of the shorter levels, it introduced a tool that appears constantly in software development and system administration. Whenever I need to compare configuration files, inspect changes between versions, or quickly identify what changed between two similar files, diff is usually the first utility I reach for. It also has several useful output modes, such as unified diffs (-u) and side-by-side comparisons (-y), which are commonly used in version control systems and code review workflows.

This Week’s Takeaways
The main theme of these levels is interacting with systems and services rather than just manipulating local files. Level 12 reinforced the importance of identifying file formats and working methodically through layered transformations, while the remaining levels introduced a small but extremely practical networking toolkit: SSH keys for authentication, nc for raw TCP communication, openssl s_client for interacting with TLS services, nmap for service discovery, and diff for comparing files efficiently.
More than any individual command, these levels taught me how much problem solving in Linux and security work comes down to understanding how different layers of a system communicate. Several of the levels followed the same general pattern: discover a service, determine how it expects to communicate, provide the correct input, and interpret the response. That workflow shows up constantly in networking, system administration, and security testing, so this set of levels felt much closer to real-world troubleshooting than the earlier Bandit exercises.
The next set turns toward privilege and trust — shell traps, setuid binaries, and cron jobs in Bandit: Levels 18–23.